I’m pretty sure I somehow mistreated shrimp chips in a past life, because this recipe has been absolutely impossible to get right. It has failed cross-testing at Serious Eats three times. (Which is why you’re now finding it here, and not there.) I originally made a version of this for my Avatar the Last Airbender cookbook (for the Fire Flakes), and it worked great—until I had to make them again. So now, after almost a dozen failed attempts across 4 different shrimp chip methods, here’s what I have. When the recipe works, it tastes awesome—better than any store-bought shrimp chip, and much more “shatteringly crisp” than the standard homemade ones with pulverized shrimp meat. When it doesn’t, it honestly still tastes pretty good, but there’s a lingering burnt flavor I just cannot figure out what from. I have left a lot of notes here to try and prevent that from happening to you, but nonetheless, proceed at your own risk. You’ve been warned.
Note: Nothing like missing my own deadlines twice in a row! Stay tuned on the cadence of this newsletter—I think it may move to Wednesdays weekly instead of Saturdays.

First, the original extended header I wrote for Serious Eats
The metallic jingle of a fresh bag of shrimp chips opening, the airy, wafer-like crunch of crustacean umami—these are moments of nostalgia captured in a striped, bubblegum pink bag. Whether in French fry form or in the classic puffed ovals that remind one of solidified foam, shrimp chips (or prawn chips) were the definitive snack of my childhood.
The shrimp chip’s rise to prominence, spreading from SE Asia onwards, is quite a marvel in and of itself. The South China Morning Post reports they date back to West Malaysia in the 16th century; Chef Lim Soon-leong says it was made as “both a snack and also a backup source of food…in times of bad weather when fisherfolk could not go to sea.” Pepper explains it was also a “way to draw the flavor from seafood parts that were usually discarded.”
Since then, this simple luxury has propagated across continents. Known as “keropok” in Malaysia, “krupuk” in Indonesia, “xia pian” in Mandarin Chinese, and evolving into long slivers of textured rope such as Nong Shim’s brand Saewoo Kkang in Korea to Calbee’s Kappa Ebisen in Japan. The hearty satisfaction of eating of shrimp chip has, clearly, been an easy one for consumers to get behind.
Since even the best-sealed bag of chips go stale (unless eaten fast enough, of course), some will opt to buy the dehydrated, ready-to-fry versions of shrimp chips that can be varied up with new seasonings. These are stiff, translucent discs of colored shrimp paste that keep essentially forever due to its low moisture content. But for maximum customizability, I decided to go back one step further—to the making of the shrimp base itself.
The classic—and seemingly most popular, per my web searches—method of making shrimp chips starts with pureed raw shrimp. This is mixed together with its equal weight in tapioca starch (or tapioca flour) with some flavorings such as salt, sugar, and MSG to form a soft dough. They are then shaped into long logs, looking a bit like rosy baguettes, and steamed to cook through the shrimp until the outside takes on a rough, bubbly feel and the inside, a rubbery consistency. This is then chilled and sliced super finely, dehydrated, and deep-fried until it puffs like fish maw.
For the mass proliferation of recipes making this process look oh-so-easy, I ran into a lot of issues. Besides the annoyance of constantly scraping slimy, grey shrimp-tapioca from my food processor (which, coincidentally, is my absolute least favorite kitchen appliance), or the fact these shrimp chips didn’t really taste like shrimp whatsoever, I could never seem to get the dehydration amount right. (Out of 5 separate trials, I only achieved maybe a handful of puffed chips.) Sometimes, the chip would balloon; other times, it drowned slowly in my fryer oil, with nary a bubble. After many failed attempts, I read up on a ChefSteps recipe for rice crackers and found what may have been the issue: “If [the chip] isn’t dehydrated enough, it will not puff well and will have erratic bubble structure; if it is too dehydrated, it will not puff at all.”
Pause for effect. This is where things should’ve gone uphill, but in reality plunged further into despair. The rest is back in my “personal” writing tone.
I decided to search the depths of food Reddit for answers. And indeed, it yielded me a clue: one responder mentioned how they remembered seeing Chinese restaurants chefs simply use shrimp stock and tapioca pearls for the base. This immediately sent me down a spiral of searching “tapioca chip” and “tapioca crisp”—and there it was, (what seemed) a much simpler method with absolutely zero food processor involved.
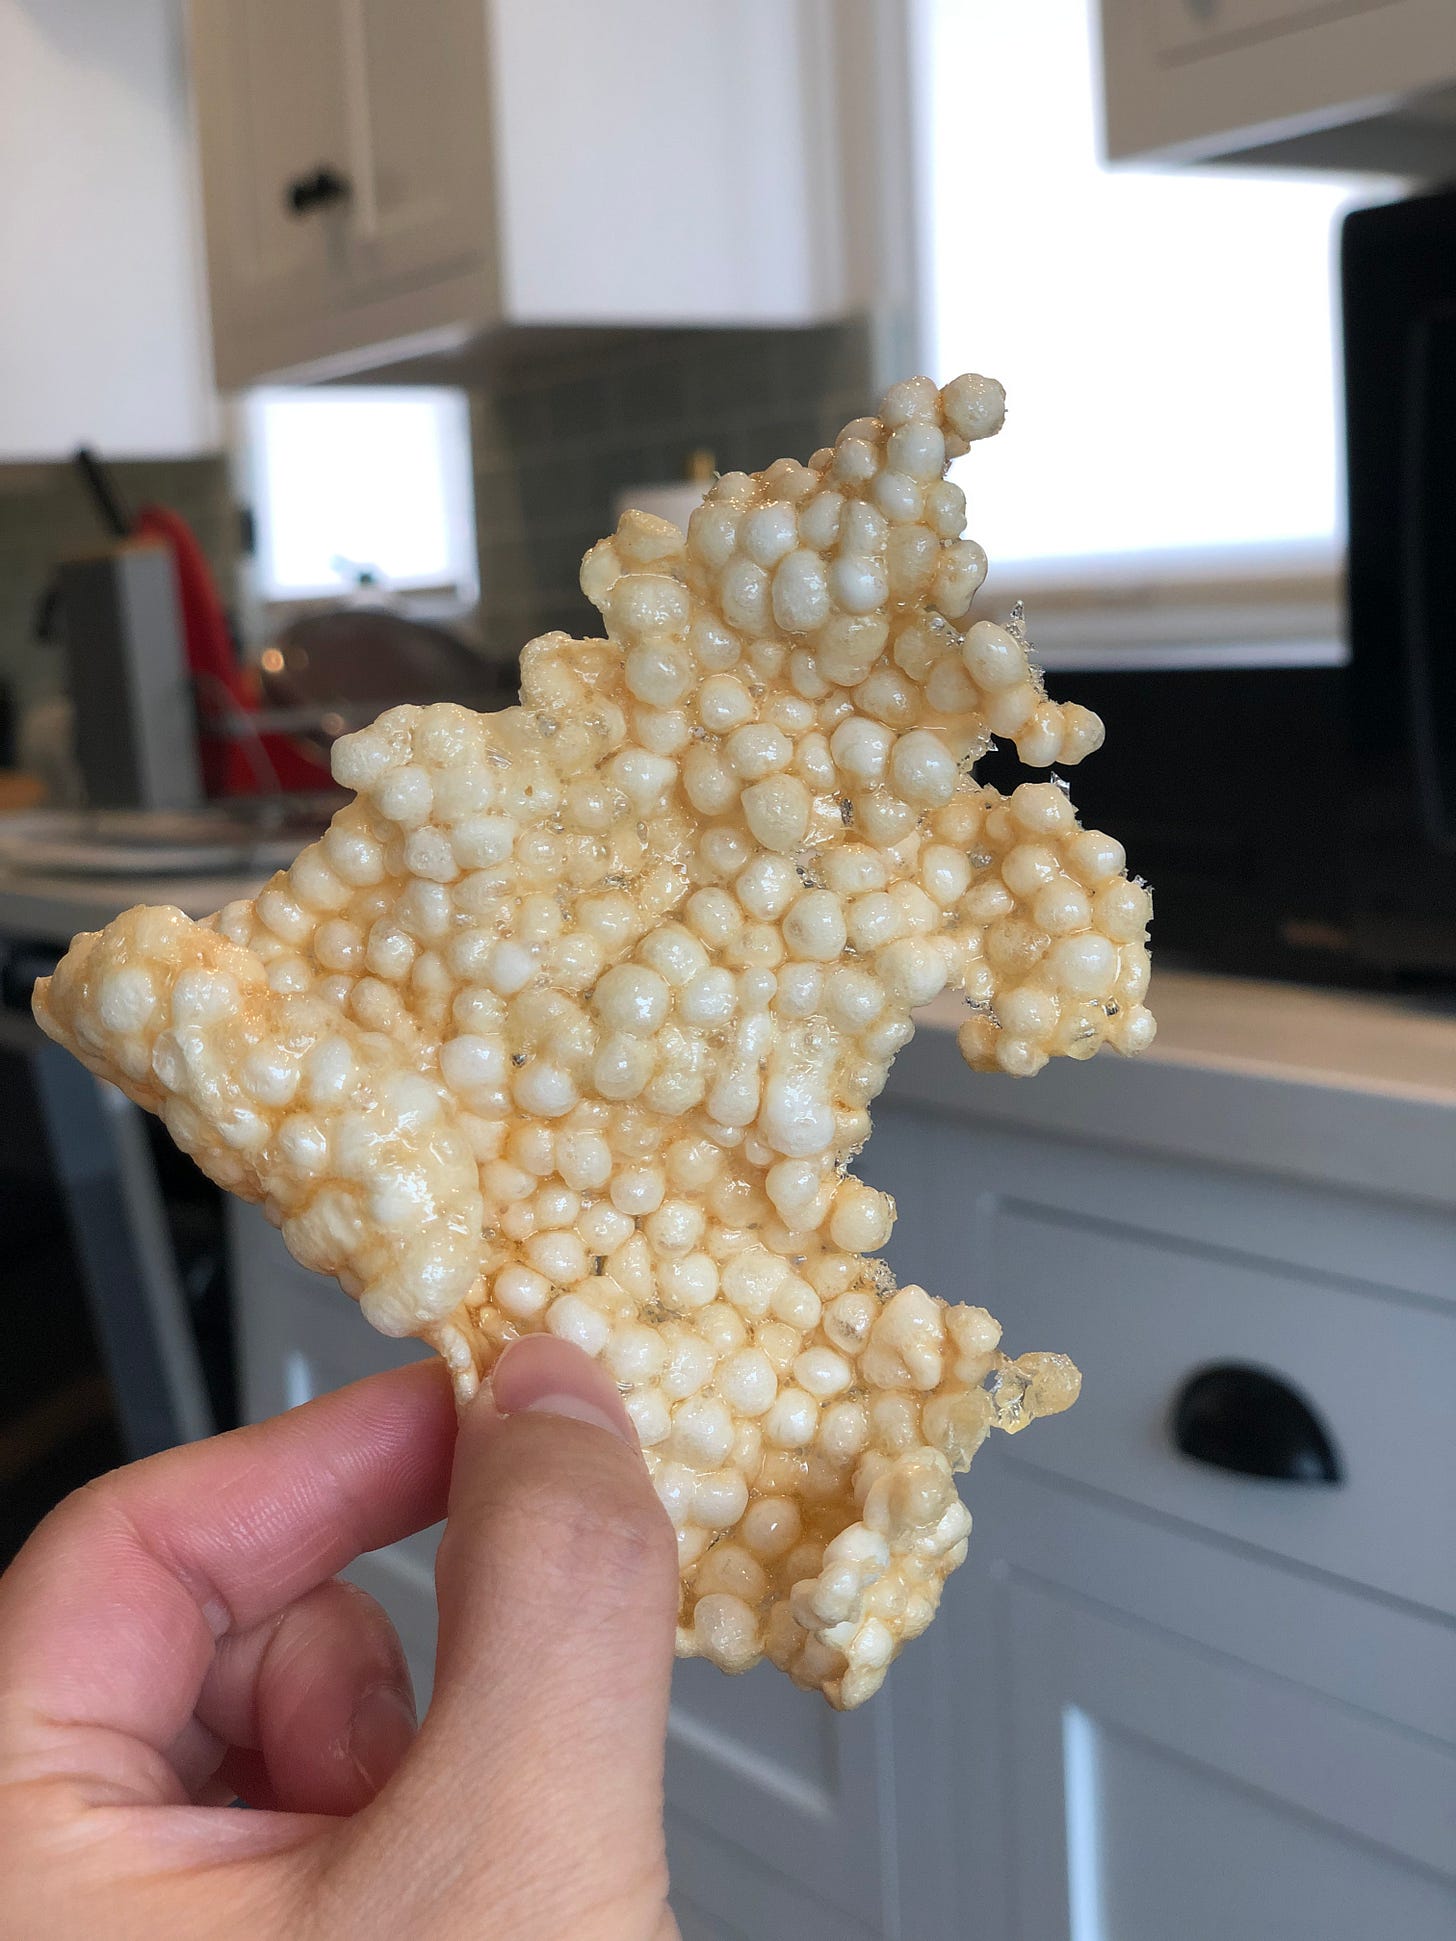
This method, in essence, is to create a concentrated stock of any flavor and gently cook mini tapioca pearls in it until well-gelled. You would then spread this onto a dehydrator sheet to dry, then deep fry it. In a perfect world, the tapioca pearls are meshed together so tightly, even after drying you have a surface full of tiny water pockets that will emit steam (and thus puff) when it hits the hot oil.
I had one, excellent initial trial (see the first photo in this post). Naturally, I managed to royal f*ck up my recipe writing for this version, so immediately after I started retesting this V2 shrimp chip, I ran into the same dehydration issue as I had with V1. Once I finally managed to get a dry base that fried up well, I could not figure out why some batches had a lingering burnt flavor. (Note 1: Now that I look at the photos again, I wonder if it’s because I didn’t do my ratios for the pearls properly. IDK. This guy seems to have it figured it out, though. Note 2: Upon one final test this morning, I think this has to do primarily with dehydration time. Too long in the dehydrator, and things start tasting very burnt.) I want to extend so many apologies to my editor and tester at Serious Eats who did their very best to work with me through this—by reducing how much the shrimps were seared, lowering the stock reduction time, increasing the tapioca pearl weight, adjusting the dehydrator temperature, trying out all different frying temperatures from 300F to 400F—until we finally just had to nix this recipe for budget reasons and move on.
But remember how I’m bad at letting go of things? (Despite having a tattoo that reads let go on my right wrist, isn’t that ironic.) After a few months’ hiatus with not enough suffering, I decided I should try this recipe again.
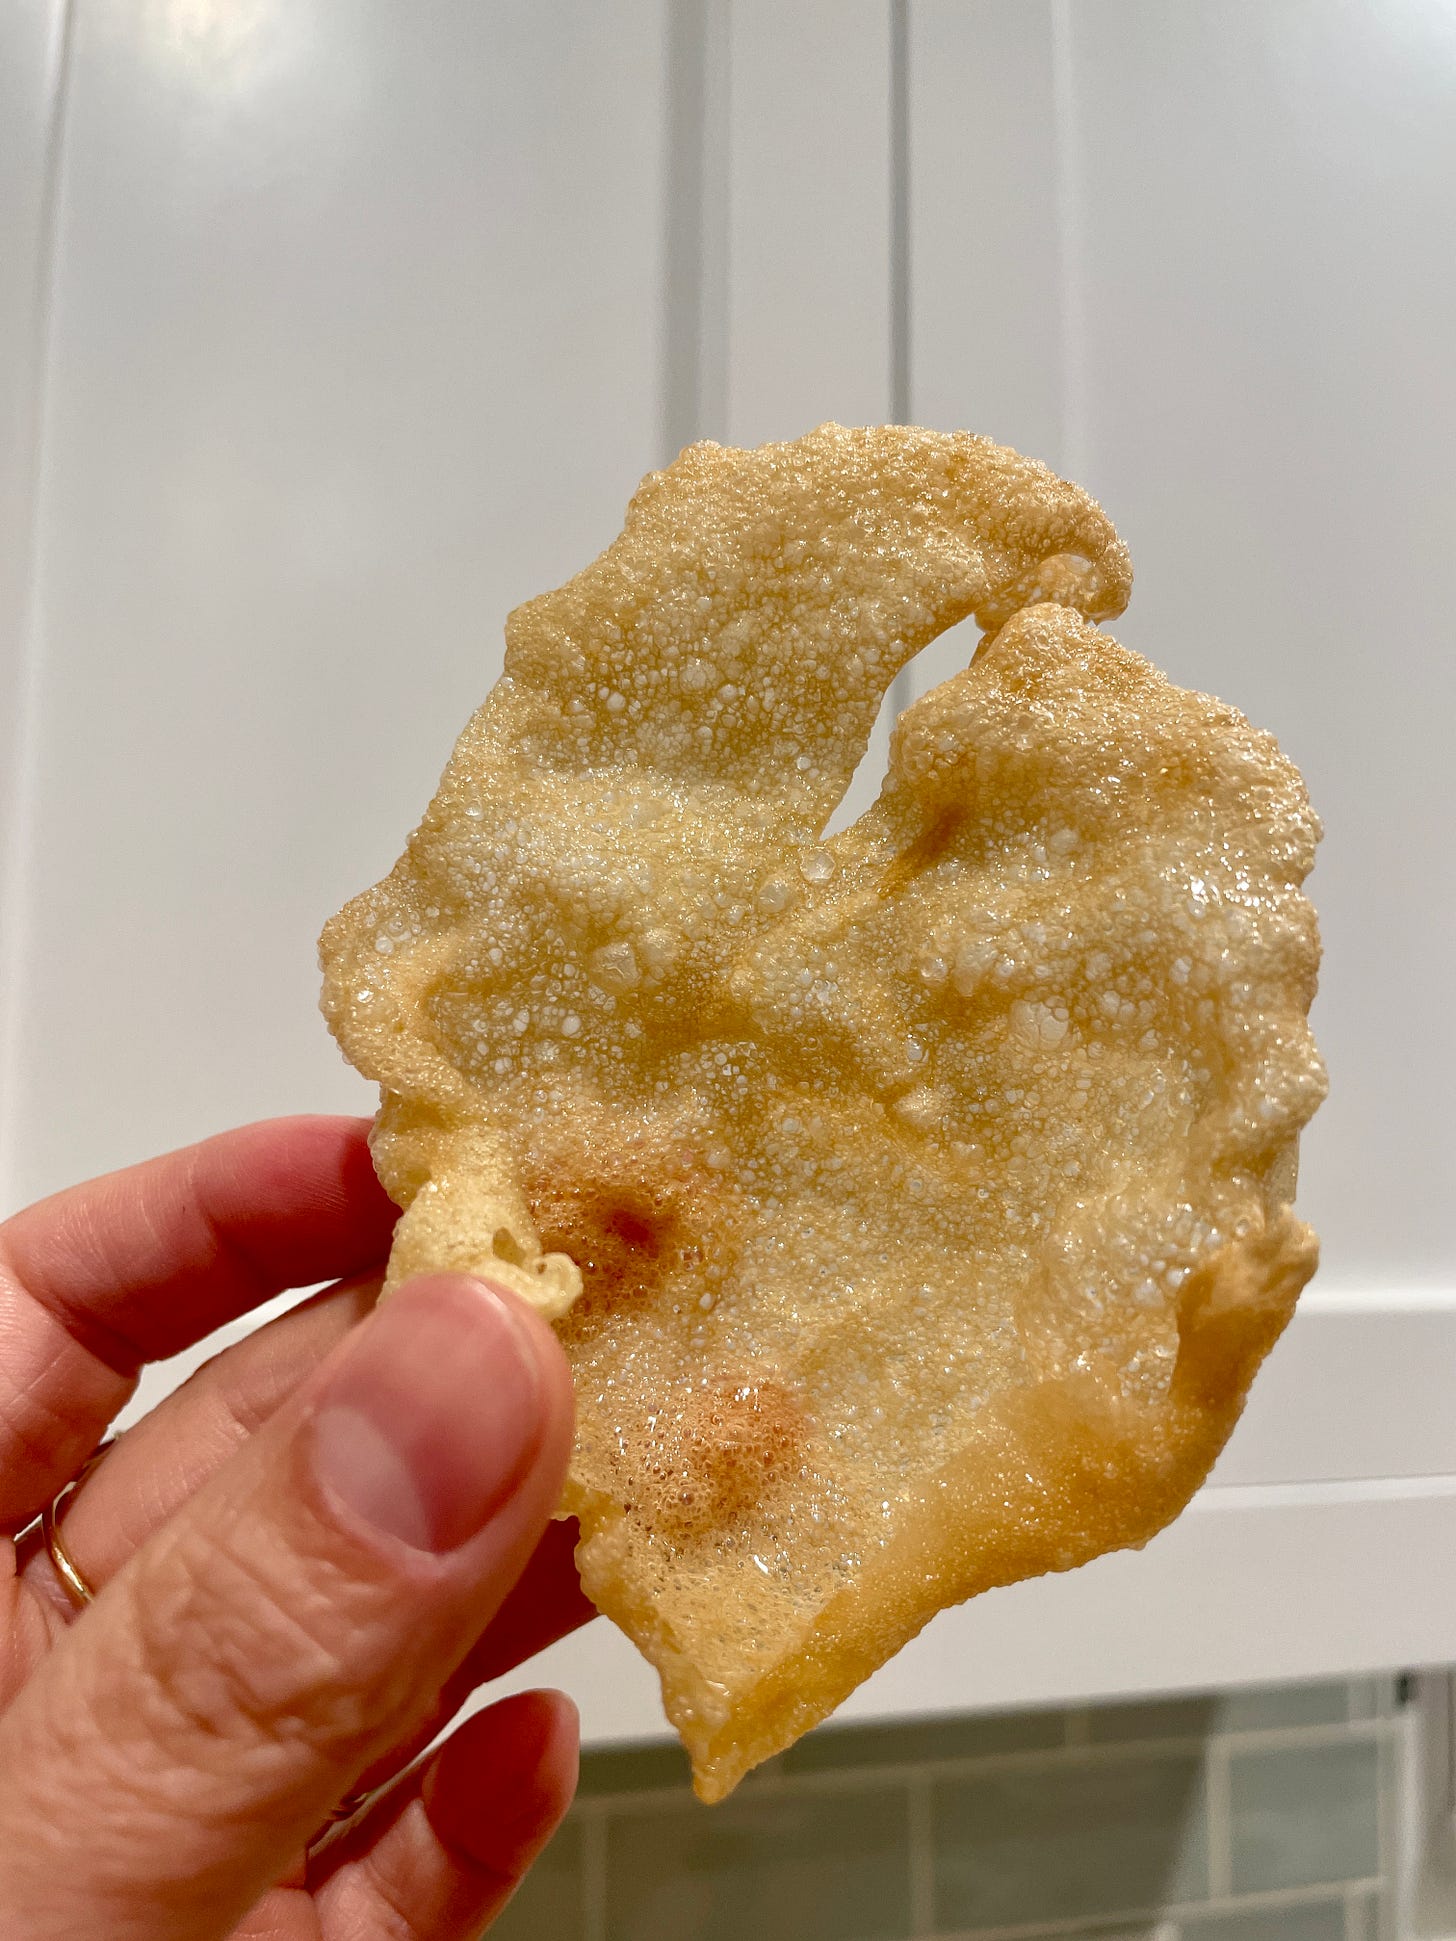
This time, I tried combining the shrimp stock base with 10% (by weight) rice flour and tapioca starch (1:1 ratio) for V3. While this resulted in a nice-looking chip, it still tasted a little burnt. (WHY, cooking gods, WHY.)
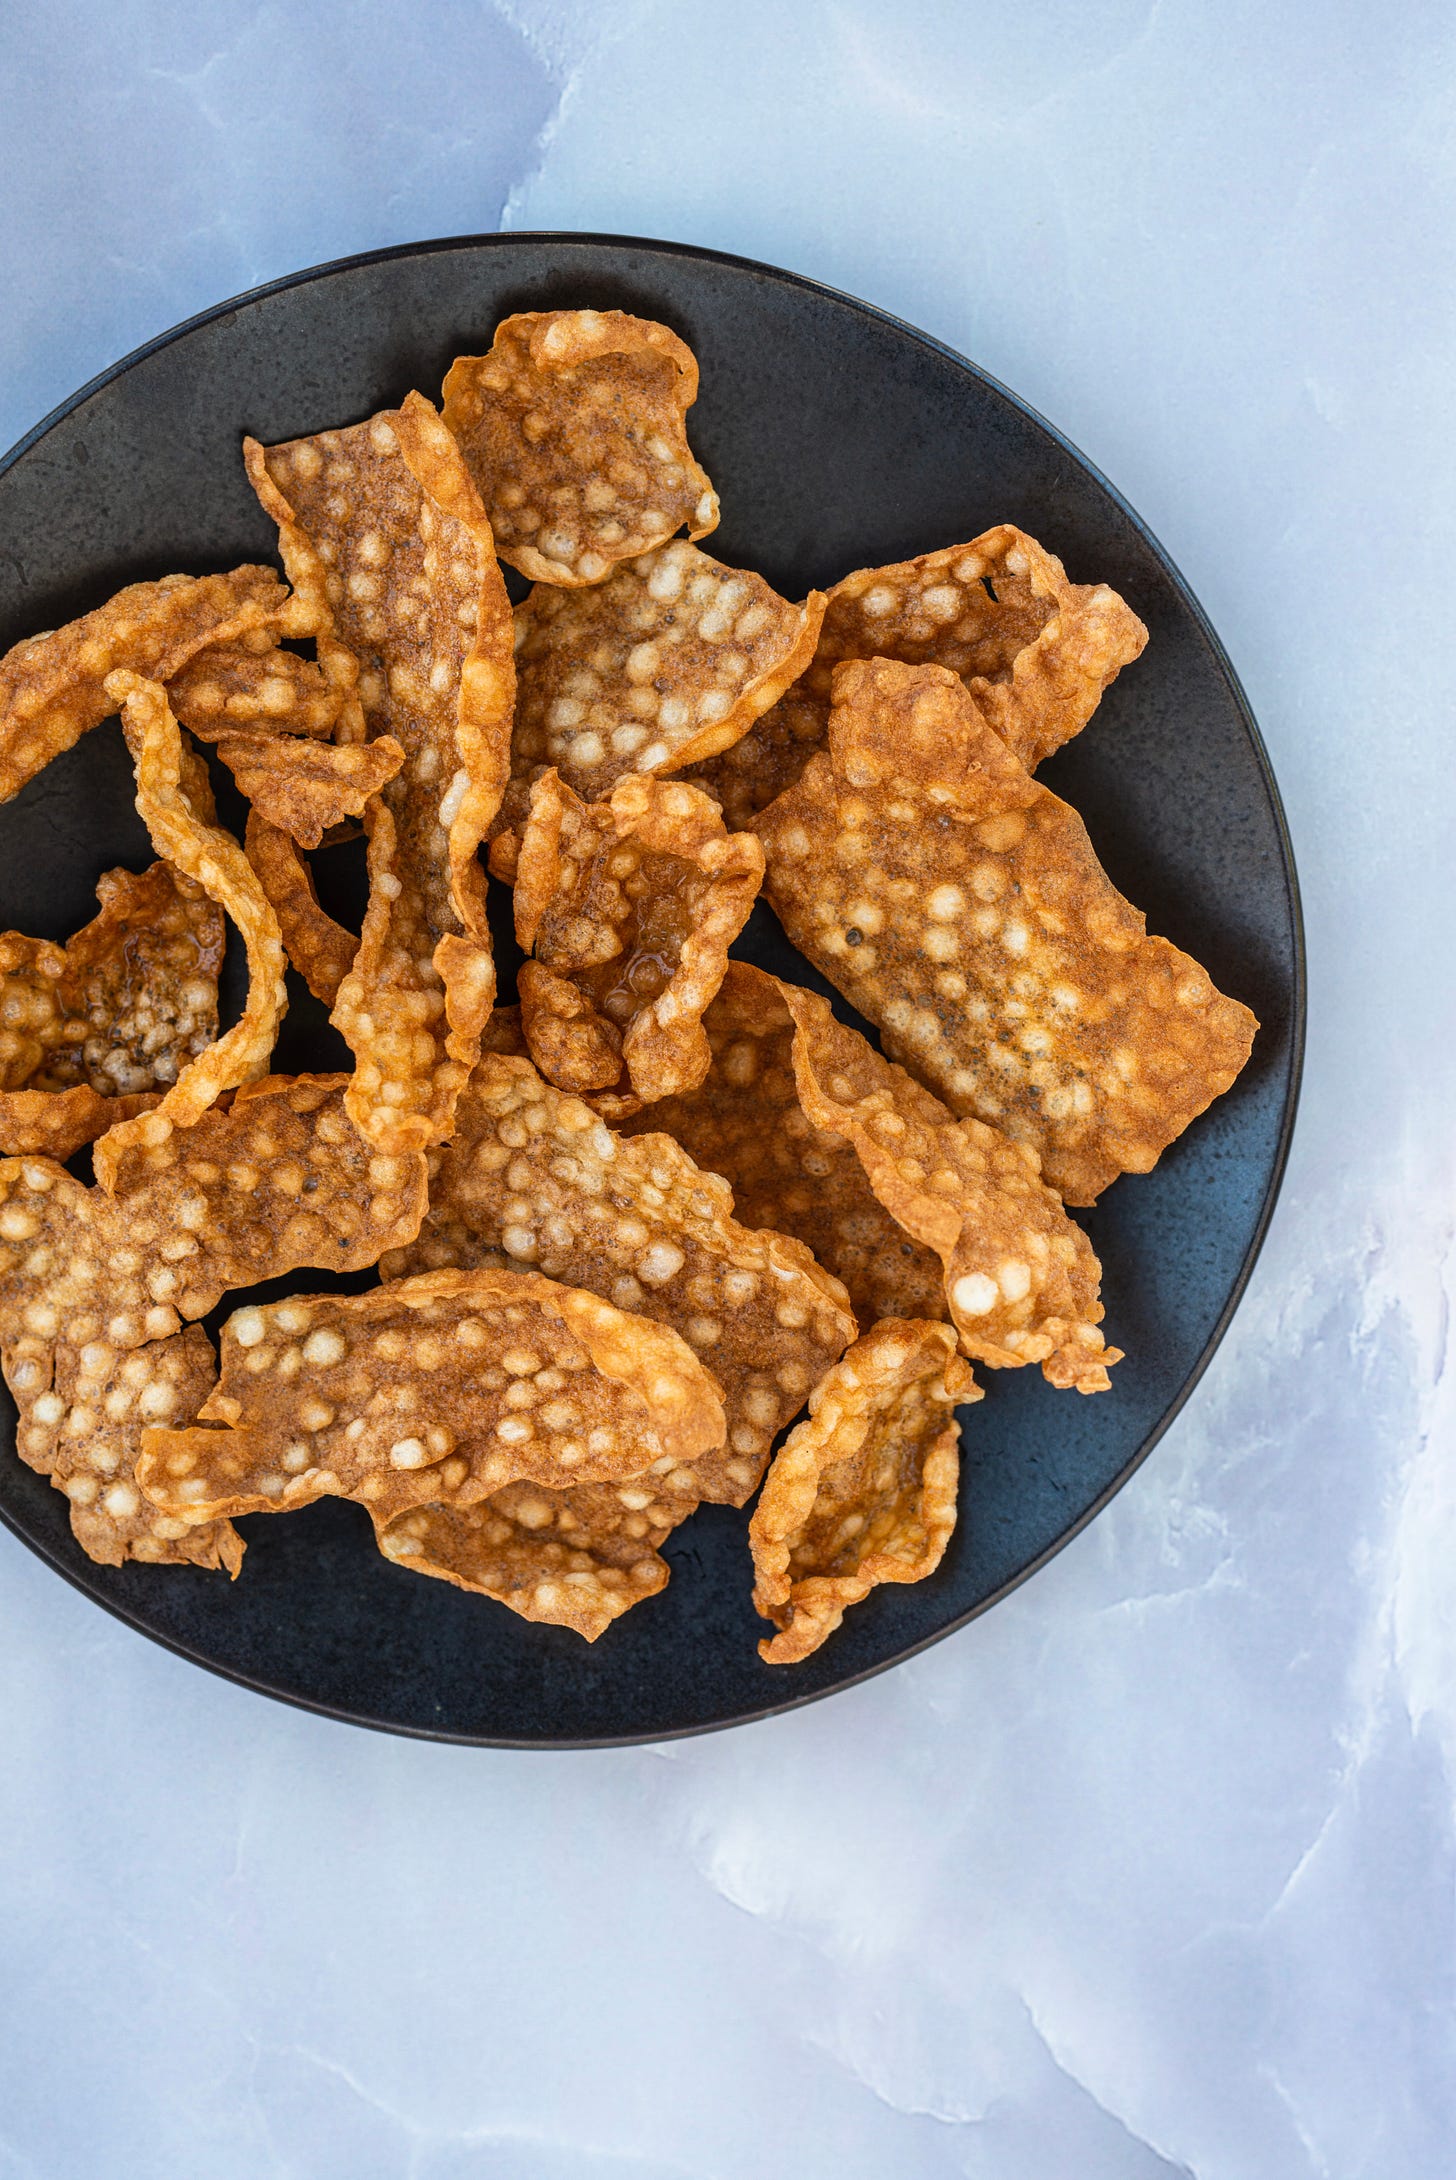
So finally, I begrudgingly went back to the first ChefSteps recipe for rice crackers, adjusted that a bit, and ended up here. This V4 chip is noticeably lighter in color than V1-3, and more bubbly in texture due to the rice puree (but not bulbous like the tapioca pearl version). It also is still a little variable in dehydrating times, so I’ve documented that below and also made a video of what the ready-to-fry chip should look like / snap like when it’s at the right moisture level. But most importantly, it doesn’t taste burnt!
Yes, it’s been a journey, and if you haven’t already scrolled away muttering “this newsletter is totally unhinged,” then let me tell you that the shrimp chips are a feathery umami party in your mouth. They are satisfying to eat in the way bubble wrap is satisfying to pop. They have just enough toasted flavor for depth, crackle perfectly with the slightest pressure, and look very beautifully pebbly all over.
It’s worth it, I think, but this really is Shrimp Chip Roulette.
Homemade Shrimp Chips (Long-Suffering, Roulette Version)
Prep Time: 1 hour
Dehydration Time: ~4 hours
Active Cook Time: <1 minute
Ingredients:
For the Shrimp Stock
1 Tbsp (15ml) neutral oil (e.g., vegetable, canola, grapeseed)
5 oz (140g) sliced yellow onion (roughly 1/2 medium onion)
4 cloves garlic (20g), peeled, sliced
1 2” knob fresh peeled ginger (15g), peeled, sliced
2 tsp (8g) kosher salt | Note: I use Morton’s Coarse, yes I will remind you every recipe
2 Tbsp (30ml) Shaoxing wine
1lb (450g) shell-on, head-on shrimp | Note: I used U20-30 size, but a change here should not affect your final product too much
6 cups (1.4L) water
1/4 tsp ground white pepper
1/4 tsp white sugar
For the Gel Base
450g shrimp stock, from above
110g short-grain white rice
250g water
Instructions:
In a medium-sized pot, heat oil over medium heat until slick and shiny. Lower heat to medium-low, then add onion, garlic, and ginger, season with a pinch of salt, and cook, stirring, until onion is translucent, about 5 minutes.
Add Shaoxing wine and cook, stirring, until almost all liquid has evaporated.
Add shrimp, salt, white pepper, and sugar. Continue cooking, stirring often, until shrimp have turned red all over, about 3 minutes.
Raise heat to high to bring shrimp stock to a simmer, then lower it to low maintain a simmer. Skim any scum that rises to the surface, and continue to simmer for 30 minutes. Note: The shrimp stock should not have reduced too much by the end of this. At first I tried to do a dramatic stock reduction for flavor purposes, but I think that contributed to the burnt taste issue.
Season to taste with additional salt, if desired. Note: The stock should taste a wee saltier than you would want from some soup you’re drinking for dinner, but not so salty you couldn’t drink a few tablespoons of it.
Strain shrimp stock through a fine-mesh strainer. Your final yield should be around 1130 grams (approximately 5 cups). Note 1: You can make the stock base ahead of time and keep it in the refrigerator. Note 2: You’ll have plenty of shrimp meat that is chewy, so I recommend using them to make shrimp filling of some sort!
Combine 450 grams of shrimp stock with 110 grams of short-grain white rice in a suitably sized pot.
Heat pot on medium heat until the rice mixture is simmering, then reduce heat to medium-low and let cook until rice has absorbed all the stock and is quite mushy. Note: This took me 25 minutes. Your rice should not be sticking to the pot at this point, just swelling with liquid so you’re just starting to hear the faintest sizzle of the rice on a dry pot.
Add 250 grams of water to the pot, and then continue simmering for another 5 minutes. Note 1: I ran out of shrimp stock so I just used water. You can probably use extra shrimp stock, I don’t see why that would be a problem, but then again my track record with shrimp chips is shit. Note 2: After this step, my yield was 525g.
Transfer all the rice and liquid to a Vitamix, and blend on high speed for 1 minute until very smooth.
Prepare your dehydrator. (I use the Excalibur 4 Tray.) Line your dehydrator trays with silpat or parchment paper.
Spoon 100 grams of gel base on each tray (approximately 2/3 cup), and spread it out to an even layer using an offset spatula. You should finish with a square that is ~10” x 10”. Note: If you’re stopping a bit to cool off your gel base at this step, press some plastic wrap directly on the surface of this gel base to keep it from forming a skin (like a congee would).
Repeat for however many trays you have, then dehydrate at 120F for 4-5 hours. Note 1: I did this on both silpat and parchment. On parchment paper, I set my timer for the 4 hour mark and about 2/3 of the sheets were done, so I fried some of them off and let the rest continue to dehydrate. They finished about 45 minutes later. Note 2: On silpats, this took about 2x longer to dry.
Break up the dehydrated sheet into large pieces (roughly 2”-3” squares). Note: You can save up dehydrated pieces in an airtight container at room temperature. They should hypothetically keep forever, but I’d say 1 month is a good arbitrary shelf life.
Heat your deep fryer or a suitably sized pot with oil to 350F. Prepare an appropriately sized draining station with paper towels nearby.
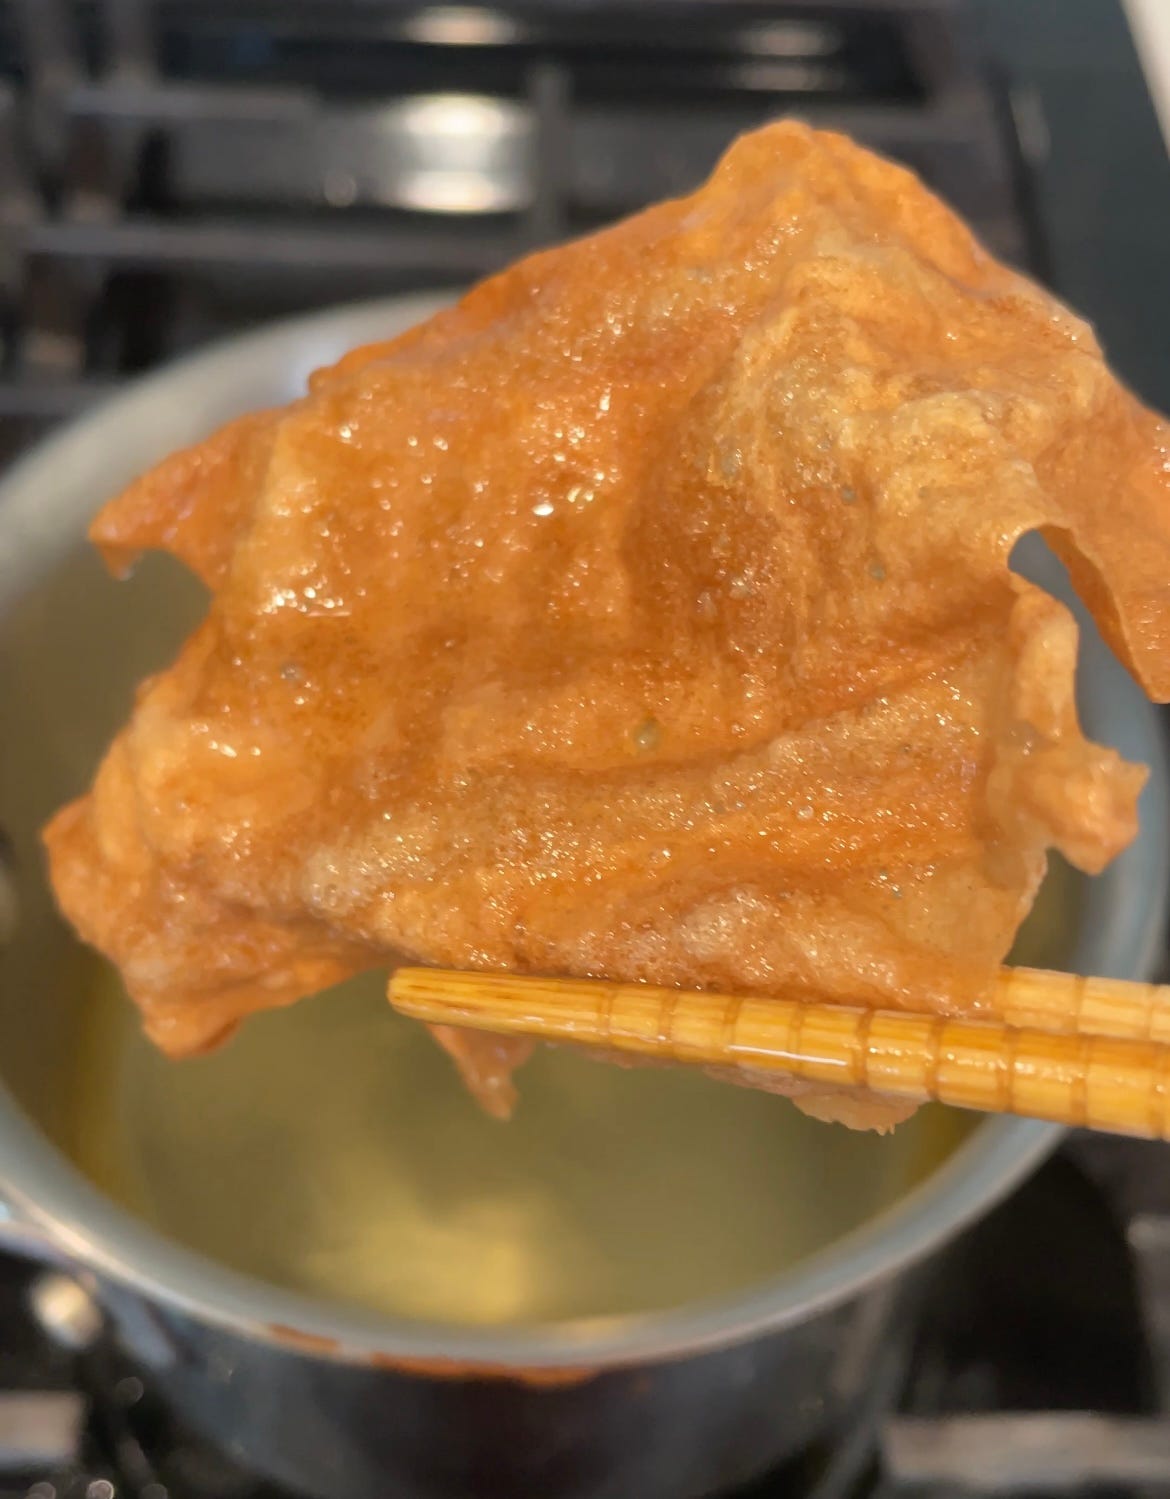
Working in batches to avoid overcrowding, fry shrimp chips until well puffed. They should sink into the oil for just a moment, then immediately pop back up and expand all over (no need to turn). This takes about 5 seconds. Note: Make sure to fry chips quickly, and to check your temperature in-between, so you don’t run into burnt flavor problems!
Transfer finished chips onto paper towels to drain. Bonus: If you really want to up the ante, you could dust with some shrimp powder.
I’m scared to even invite comments about this recipe, but I will. If you make these, please tag me (@chefjennydorsey everywhere) in your photos and direct frustrations in the discussion board below. I promise to help troubleshoot, and if you can find a method that reliably makes shrimp chips without such a hassle, please tell me. I’d love to know.


